With our guide, learn how to draw an anime character the easy way! Follow our step-by-step instructions and discover tips for depicting the characteristic features of this popular art style. Develop your artistic skills and impress those around you with your original creations. Let your imagination run wild and start drawing anime characters today!
Learn to draw an anime character and express your creativity
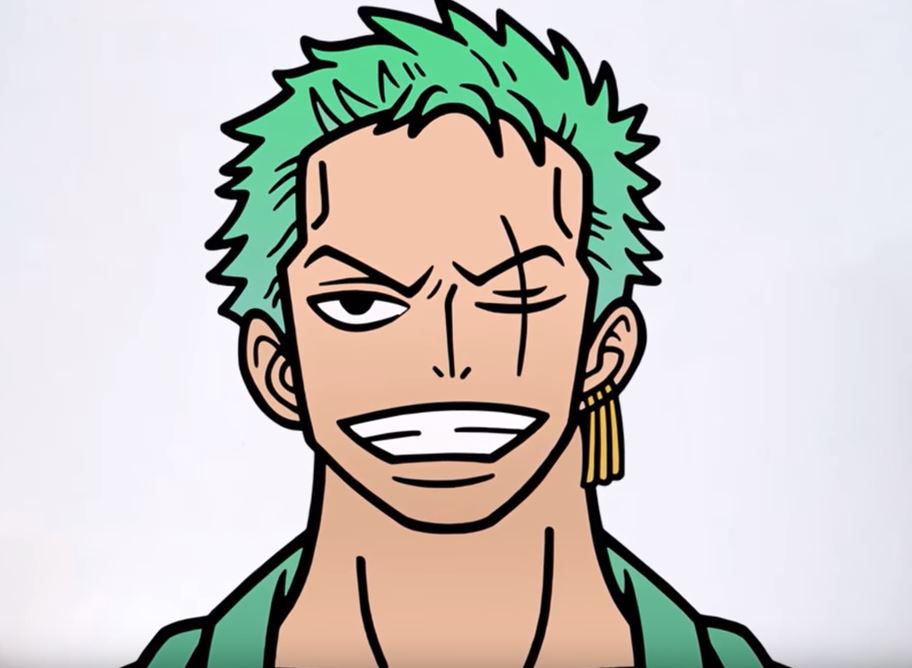
Anime characters are known for their large, expressive eyes, original hairstyles and stylized proportions. If you're passionate about Japanese animation and want to learn how to draw in this style, this guide is for you. Whether you're a beginner or an expert, drawing an anime character is within everyone's reach with a little patience and practice.
Step 1: Sketch the basic structure
To begin, take a sheet of paper and a pencil. Draw a circle to represent the head. Add a vertical line in the center and a slightly curved horizontal line to locate the eyes. These markers will help you balance the proportions of the face.
Next, trace the outline of the body using simple geometric shapes. For example:
- An oval for the torso
- Cylinders for arms and legs
- Small circles for the joints
Keep proportions in mind: anime characters generally have larger heads in relation to their bodies, to accentuate their expressiveness.
Step 2: Drawing facial features
The face is a key element of anime style. Follow these steps to structure it correctly:
- The eyes Draw two large symmetrical eyes, using the horizontal line you drew earlier. Anime eyes are often oval, with a large pupil and several reflections to give an impression of depth.
- Nose and mouth The nose is often minimalist, and a simple line or dot may suffice. As for the mouth, it's usually small and expressively simple.
- Eyebrows They play an important role in the character's expression. Thick, thin, straight or arched, they totally change his appearance.
Step 3: Draw the hair
Anime hair is often stylized and dynamic. Start by drawing the general shape of the hair using flowing curves. Then add highlights to add volume and movement. Remember to vary the thickness of the strands for a more natural effect.
Step 4: Sketching the body and clothes
Add body details following the structure sketched at the beginning:
- Refine the shape of arms and legs
- Add hands and feet by simplifying the shapes at the start
- Design garments taking into account folds and fabric movement
Anime clothes vary according to the character's style: school uniforms, combat outfits, traditional Japanese clothing, etc. Have fun experimenting with different looks!
Step 5: Add shadows and details
Once you've completed the basic design, add shading to add depth. Use hatching or soft gradients to accentuate certain areas, such as under the chin, around the eyes and on clothing. You can also add motifs and accessories to further personalize your character.
Step 6: Inking and coloring
Finally, iron the main lines with a fine pen or black felt-tip pen to give a clean, crisp finish. Erase the construction lines, then color in your character with colored pencils, markers or digital drawing software.
Conclusion
Learning to draw an anime character is an exciting adventure that requires patience and practice. By following these steps, you can gradually improve your technique and bring your own creations to life. Don't hesitate to draw inspiration from your favorite series and experiment with different styles to refine your pencil stroke. So grab your pencils and let your imagination run wild! 🎨✏️

